Show a list of models
It's time to fill the product page we created in the last part with some content.
Create the product model
First of all, we will create a simple product class for our made-up products. Each product will contain an id, a name and a price.
For the sake of simplicity, the class will also contain two static methods, getAll() and getById() that returns all products and a product by id respectively.
Create the directory Application/Models/ and in that directory, add the file Product.php with the following content:
<?php

declare(strict_types=1);

namespace Application\Models;

class Product
{
    public string $Id;

    public string $Name;

    public int $Price;

    public function __construct(string $id, string $name, int $price)
    {
        $this->Id = $id;
        $this->Name = $name;
        $this->Price = $price;
    }

    public static function getAll(): array
    {
        return [
            new self('foo', '24 inch LCD Monitor', 140),
            new self('bar', 'USS Enterprise Scale Replica', 20),
        ];
    }

    public static function getById(string $id): ?self
    {
        foreach (self::getAll() as $product) {
            if ($product->Id === $id) {
                return $product;
            }
        }

        return null;
    }
}
This is just a very simplified replacement for a real ORM class, since database functionality is out of scope for BlueMvc and this tutorial.
Pass the products in the controller
The next step is to use the class above to get all the products in the controller and pass them to the view.
Open Application/Controllers/ProductsController.php and modify the content to look like this:
<?php

declare(strict_types=1);

namespace Application\Controllers;

use Application\Models\Product;
use BlueMvc\Core\Controller;
use BlueMvc\Core\View;

class ProductsController extends Controller
{
    public function indexAction(): View
    {
        $products = Product::getAll();

        $this->setViewItem('Title', 'Products');

        return new View($products);
    }
}
Show the products in the view
Finally, the view should be modified to show the products.
Since the Model in this view is an array of Product instances, we will loop through the Model and print out the product names one by one.
Open Application/Views/Products/index.twig and modify the content to look like this:
{% extends "sitelayout.twig" %}
{% block content %}

<h1>Products</h1>

<ul>
    {% for Product in Model %}
        <li>{{ Product.Name }}</li>
    {% endfor %}
</ul>

{% endblock %}
Note that the order of parameters in the for statement is reversed compared to PHPs foreach. For more information about using the for loop in Twig, see the Twig for documentation.
Check the result
Reload the http://localhost/products/ page:
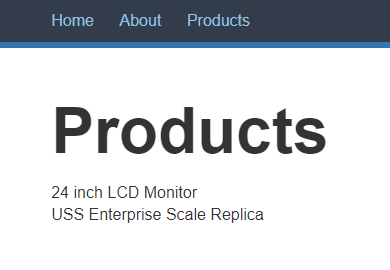
Voila! There is our product list.
In the next part, we will continue working with the products and create separate pages for each one.
✎ Published in category get started


